In today’s digital age, having a professional website is crucial for businesses and individuals alike. It serves as your virtual storefront, accessible to anyone, anywhere, at any time. Whether you’re showcasing your portfolio, promoting your services, or selling products online, a well-designed website can make all the difference in attracting and engaging with your audience.
Hostinger’s Website Builder offers a user-friendly and intuitive platform to create a stunning website without any coding knowledge. With a wide range of templates and customization options, you can easily tailor your site to fit your brand and vision. Whether you’re a beginner or an experienced user, Hostinger’s Website Builder provides the tools you need to bring your website to life.
In this step-by-step guide, we will walk you through the process of building a website using Hostinger’s Website Builder. From choosing a template to adding content and optimizing for search engines, we’ll cover everything you need to know to create a professional and effective website. So, let’s get started and build your online presence today!
Hostinger Builder Ultimate Guide in 2024 (Table of Contents)
- Introduction to Hostinger
- Getting Started with Hostinger
- Choosing the Right Hosting Plan
- Selecting a Template
- Customizing Your Website
- Adding Functionality with Hostinger Apps
- Optimizing for SEO
- Mobile Optimization
- Publishing Your Website
- Managing Your Website
- Getting Support
- FAQs
1. Introduction to Hostinger
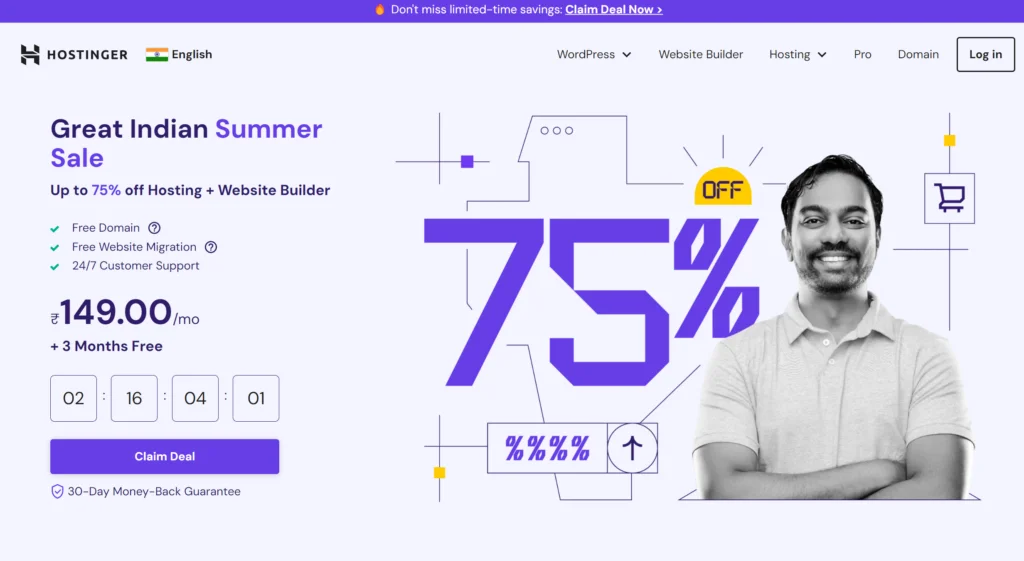
Hostinger also offers a range of hosting services, including shared hosting, VPS hosting, and cloud hosting. Shared hosting is a popular choice for individuals and small businesses, as it is affordable and easy to set up.
VPS hosting provides more resources and control, making it suitable for websites with higher traffic or specific technical requirements. Cloud hosting offers scalability and reliability, making it ideal for growing websites.
Hostinger’s hosting plans come with a variety of features, including a free domain name, SSL certificate, and website builder. The company also provides 24/7 customer support via live chat, ensuring that you can get assistance whenever you need it.
Hostinger is a reliable web hosting provider that offers affordable plans, a user-friendly website builder, and a range of hosting options to suit different needs.
2. Getting Started with Hostinger
-
Sign Up for an Account: Begin by visiting the Hostinger website and signing up for an account. This process typically involves providing your email address, creating a password, and selecting a hosting plan that aligns with your website needs.
-
Choose a Domain Name: If you don’t already have a domain name, you can register one through Hostinger during the signup process. Alternatively, if you already own a domain name, you can easily connect it to your Hostinger account.
-
Select a Hosting Plan: Hostinger offers a variety of hosting plans, each tailored to different needs. Consider factors such as website size, expected traffic, and budget when selecting your plan. Shared hosting is suitable for small to medium-sized websites, while VPS hosting offers more resources and control.
-
Install Hostinger’s Website Builder: Once you’ve signed up and chosen a hosting plan, you can install Hostinger’s website builder from your hosting account’s control panel. Look for the website builder or website management section in the control panel, and follow the on-screen instructions to install it.
-
Begin Building Your Website: With Hostinger’s website builder installed, you can now start building your website. Use the drag-and-drop interface to add and customize elements such as text, images, and videos. Hostinger’s website builder offers a range of templates to choose from, making it easy to create a professional-looking website in no time.
-
Customize Your Website: Once you’ve added your content, take some time to customize the look and feel of your website. Adjust colors, fonts, and layout to match your brand or personal style.
-
Preview and Publish Your Website: Before publishing your website, preview it to ensure everything looks as expected. Once you’re happy with the result, you can publish your website to make it live on the internet.
-
Optimize for SEO: After publishing your website, consider optimizing it for search engines (SEO). This involves adding relevant keywords to your content, optimizing images, and ensuring your website is mobile-friendly.
-
Monitor Performance: Keep an eye on your website’s performance using Hostinger’s built-in analytics tools or third-party analytics platforms. This can help you identify areas for improvement and make informed decisions to enhance your website’s performance.
-
Maintain and Update Regularly: Regularly update your website with fresh content and security patches to keep it secure and engaging for your visitors. Hostinger provides tools and resources to help you manage and maintain your website effectively.
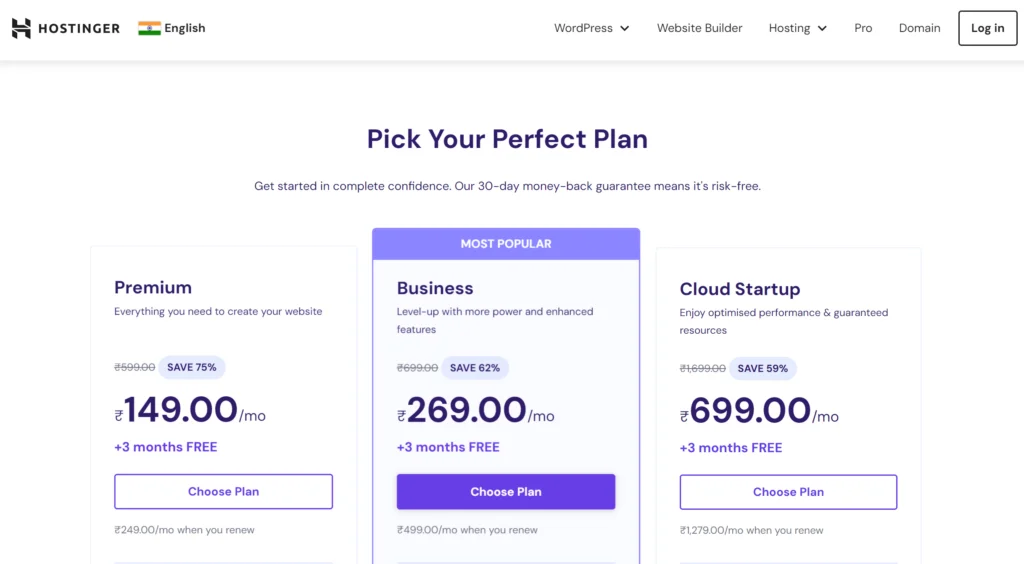
3. Choosing the Right Hosting Plan
-
Shared Hosting: Shared hosting is the most affordable option and is suitable for small websites, blogs, and personal projects. With shared hosting, your website shares server resources with other websites, which can lead to slower performance during peak traffic times.
-
VPS Hosting: VPS (Virtual Private Server) hosting provides a dedicated portion of a server’s resources, offering more stability and performance compared to shared hosting. VPS hosting is suitable for medium-sized websites with moderate traffic.
-
Cloud Hosting: Cloud hosting uses a network of virtual servers to host your website, offering scalability and reliability. Cloud hosting is suitable for high-traffic websites and online stores that require maximum uptime and performance.
-
WordPress Hosting: Hostinger also offers specialized WordPress hosting plans, optimized for WordPress websites. These plans come with features such as automatic WordPress updates, caching, and security enhancements.
-
E-commerce Hosting: If you’re building an online store, consider Hostinger’s e-commerce hosting plans, which are optimized for e-commerce platforms such as WooCommerce and Magento. These plans come with features such as SSL certificates, payment gateway integration, and e-commerce website builders.
-
Website Builder Hosting: Hostinger’s website builder hosting plans are designed for users who want to create a website without any coding knowledge. These plans include a drag-and-drop website builder and a variety of templates to choose from.
-
Email Hosting: Hostinger offers email hosting services, allowing you to create professional email addresses using your domain name. Email hosting plans come with features such as spam filtering, email forwarding, and IMAP/POP3 support.
When choosing a hosting plan, consider your website’s needs in terms of traffic, performance, and budget. Hostinger’s range of hosting plans ensures that you can find one that meets your requirements.
4. Selecting a Template
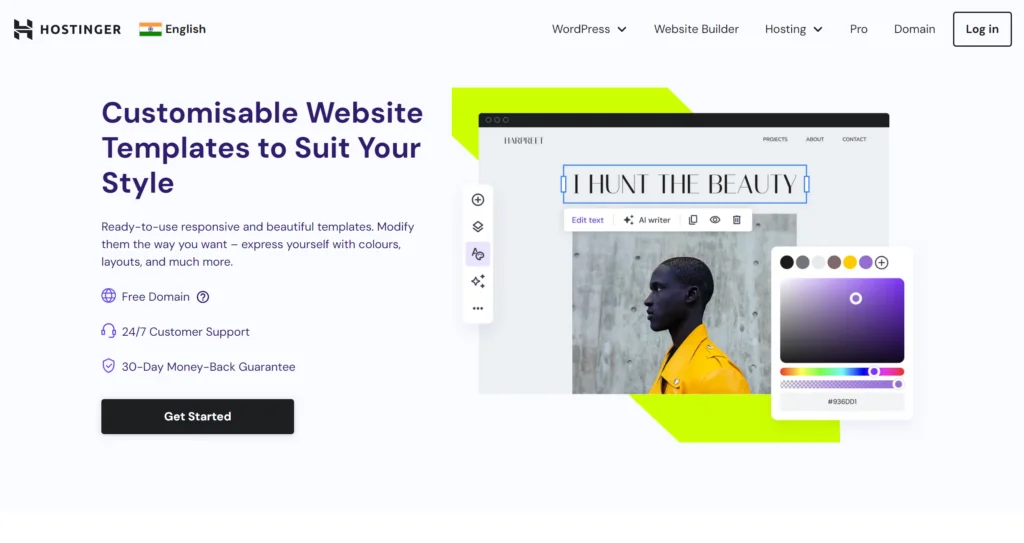
Browse Templates: Start by browsing through Hostinger’s gallery of templates. These templates are usually categorized by industry or style, making it easier for you to find one that suits your website’s theme.
- Navigate to the templates section of Hostinger’s website builder or control panel.
- Use the filters or search bar to narrow down your options based on your industry, website type, or design preferences.
- Click on a template to view more details, such as its layout, color scheme, and available features.
Preview Templates: Before selecting a template, take advantage of Hostinger’s preview feature to see how the template will look on your website. This allows you to assess whether the template meets your design and functionality requirements.
- Look for a “preview” or “demo” button next to the template you’re interested in.
- Click on the button to see a live preview of the template in action.
- Pay attention to the layout, color scheme, typography, and overall design to ensure it aligns with your vision for your website.
Select a Template: Once you’ve found a template that you’re happy with, select it to start customizing it for your website.
- Look for a “select” or “choose” button next to the template preview.
- Click on the button to confirm your selection and begin customizing your chosen template.
5. Customizing Your Website
Changing Colors and Fonts:
- Hostinger’s website builder typically allows you to easily change the colors and fonts of your website to match your brand’s identity.
- Look for options to customize the color scheme of your website, including background colors, text colors, and accent colors.
- Similarly, you can choose from a variety of fonts to use for headings, body text, and other elements on your website.
Adding Content:
- Add text to your website to provide information about your business, products, or services. Hostinger’s website builder usually offers a text editor with formatting options.
- Include images and videos on your website to make it more visually appealing. Hostinger’s website builder may provide a media library where you can upload and manage your media files.
- Consider adding other types of content, such as testimonials, customer reviews, or blog posts, to engage your audience and provide valuable information.
Adjusting Layout:
- Arrange the elements on your website’s pages to create a layout that works best for your content. Hostinger’s website builder typically offers a drag-and-drop interface for easy layout customization.
- You can add sections, columns, and rows to your pages to create a structured layout. Rearrange these elements by dragging and dropping them into place.
Experiment with different layout options to find one that showcases your content effectively and provides a good user experience.
Adding Features and Functionality:
-
- Hostinger’s website builder may offer additional features and functionality that you can add to your website, such as contact forms, maps, or social media integration.
- Explore these options to enhance your website’s functionality and provide a better user experience for your visitors.
Consider adding e-commerce features if you’re building an online store, such as product listings, shopping carts, and payment gateways.
Previewing and Publishing Your Changes:
- Before publishing your changes, use Hostinger’s preview feature to see how your website will look to visitors.
- Once you’re satisfied with the customization, publish your website to make it live on the internet. Hostinger’s website builder typically offers a one-click publishing option for easy deployment of your changes.
6. Adding Functionality with Hostinger Apps
Hostinger’s apps can indeed add valuable functionality to your website. Besides the ones you mentioned, there are many others available, depending on your needs:
-
Website Builder: Hostinger’s website builder offers a drag-and-drop interface for easy website creation without needing to code.
-
WordPress: Hostinger offers easy installation and management of WordPress, a popular platform for building websites and blogs.
-
Email Hosting: Set up professional email addresses associated with your domain name.
-
Analytics Tools: Monitor your website’s performance and visitor behavior with analytics tools.
-
Security Features: Enhance your website’s security with features like SSL certificates, firewall protection, and automatic backups.
-
Developer Tools: Access tools like Git, SSH, and PHP to customize and manage your website’s backend.
-
Marketing Tools: Promote your website with marketing tools like advertising credits, newsletters, and social media integrations.
-
CMS Integration: Integrate popular content management systems (CMS) like Joomla and Drupal for more advanced website functionality.
Consider your website’s goals and audience to choose the most suitable apps.
7. Optimizing for SEO
Hostinger’s SEO tools can indeed help you optimize your website for better search engine rankings. In addition to the features you mentioned, here are a few more tips to optimize your website for SEO:
-
Quality Content: Create high-quality, relevant, and engaging content that provides value to your audience. This not only improves your website’s visibility but also encourages visitors to stay longer on your site.
-
User Experience: Ensure your website is easy to navigate, with clear and concise menus and a responsive design that works well on both desktop and mobile devices.
-
Page Speed: Optimize your website’s loading speed by reducing image sizes, using caching plugins, and minimizing the use of heavy scripts.
-
Internal Linking: Link-related pages within your website to help search engines understand the structure of your site and improve user navigation.
-
External Linking: Link to reputable sources in your content to provide additional value to your readers and improve your website’s credibility.
-
Social Media Integration: Integrate social media sharing buttons on your website to encourage visitors to share your content, which can improve your website’s visibility and SEO.
By implementing these strategies alongside Hostinger’s SEO tools, you can enhance your website’s SEO performance and attract more organic traffic.
8. Mobile Optimization
With an increasing number of users accessing websites on mobile devices, it’s essential to optimize your website for mobile. Hostinger’s website builder offers mobile-responsive templates that automatically adjust to fit different screen sizes.
9. Publishing Your Website
Publishing your website on Hostinger is a straightforward process. Here’s a general overview of how to do it:
-
Domain Configuration: If you haven’t already, configure your domain name to point to your Hostinger hosting account. You can do this by updating your domain’s DNS settings.
-
Upload Your Files: Using an FTP client or Hostinger’s file manager, upload your website files to the public_html directory (or the directory specified for your domain).
-
Database Setup (If Required): If your website uses a database (e.g., for WordPress), create a database and a database user through the MySQL Databases section of your Hostinger control panel. Update your website’s configuration files with the database details.
-
Testing: Before publishing, it’s a good idea to test your website to ensure everything is working correctly. You can use a temporary URL provided by Hostinger to preview your site.
-
Publishing: Once you’re satisfied with the testing, you can publish your website by updating your domain’s DNS settings to point to your Hostinger hosting account. This change may take some time to propagate.
-
SSL Certificate (Optional): Consider securing your website with an SSL certificate, which encrypts data transferred between your website and its visitors. Hostinger offers free SSL certificates with its hosting plans.
-
Monitoring and Maintenance: After publishing your website, regularly monitor its performance and security. Update your website’s content and software as needed to keep it relevant and secure.
By following these steps, you can easily publish your website on Hostinger and make it accessible to your audience on the internet.
10. Managing Your Website
Managing your website on Hostinger is convenient thanks to its user-friendly dashboard. Here are some key aspects of website management you can handle through your Hostinger account:
-
File Management: Use the File Manager tool to upload, download, and edit your website files directly from your browser.
-
Database Management: Manage your website’s databases using the MySQL Databases tool. You can create, edit, and delete databases and database users.
-
Domain Management: Configure and manage your domain settings, including DNS records, subdomains, and domain redirection, from the Domain section of your Hostinger account.
-
Email Management: Set up and manage email accounts associated with your domain using the Email Accounts tool. You can create new email addresses, set up email forwarding, and manage email aliases.
-
SSL Certificate: Manage your website’s SSL certificate from the SSL Certificates section. You can install, renew, and configure SSL certificates to secure your website.
-
Backup and Restore: Use the Backup tool to create and restore backups of your website files and databases. Regular backups can help you recover your website in case of data loss or errors.
-
Website Builder: If you’re using Hostinger’s website builder, you can manage your website’s content, layout, and design directly from the builder’s interface.
-
Analytics: Monitor your website’s performance and visitor behavior using analytics tools. Hostinger may offer built-in analytics or support integration with third-party analytics services.
-
Security: Keep your website secure by regularly updating software, using strong passwords, and enabling security features provided by Hostinger, such as firewall protection and malware scanning.
By utilizing these tools and features provided by Hostinger, you can effectively manage your website, ensuring it remains secure, up-to-date, and optimized for performance.
11. Getting Support
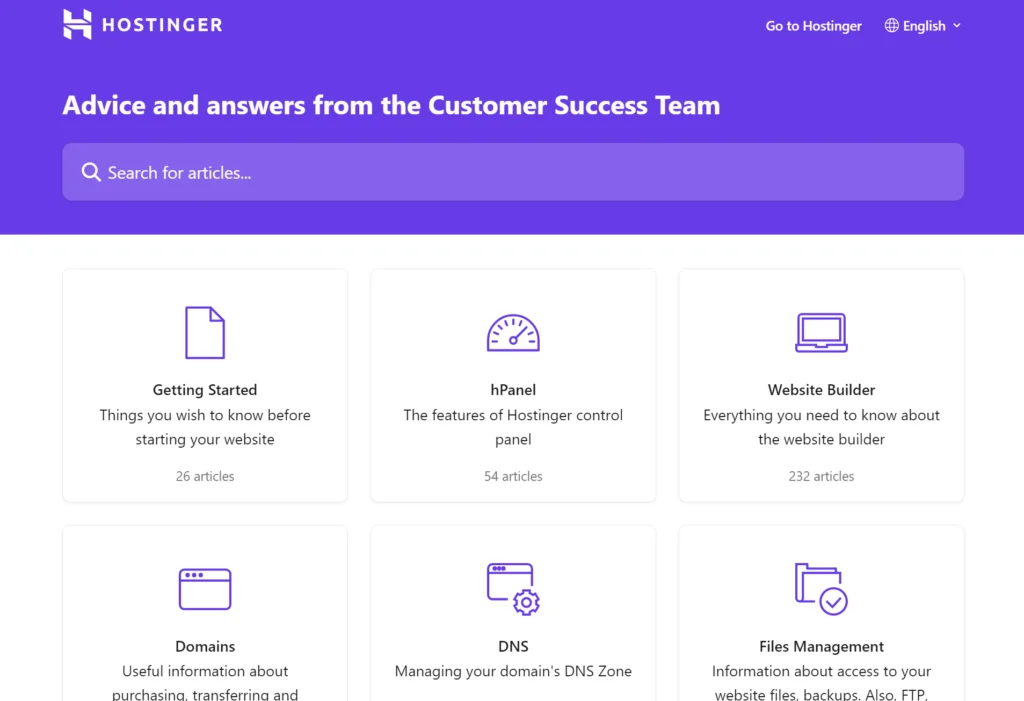
Hostinger’s support resources are indeed valuable for resolving any issues you encounter during website building or management. Here’s how you can access support:
-
Help Center: Hostinger’s Help Center is a comprehensive resource where you can find articles, tutorials, and guides on various topics related to website building, hosting, and management. You can search for specific topics or browse through categories to find relevant information.
-
Knowledge Base: Hostinger’s Knowledge Base contains a wealth of information on topics such as domain management, website building, cPanel usage, and more. You can find step-by-step instructions, troubleshooting tips, and answers to frequently asked questions.
-
Live Chat: If you need immediate assistance, Hostinger offers live chat support where you can chat with a support representative in real-time. This can be particularly helpful for resolving urgent issues or getting clarification on complex topics.
-
Ticket Support: For non-urgent inquiries or issues that require more detailed troubleshooting, you can submit a support ticket through Hostinger’s ticketing system. A support representative will review your request and provide assistance as soon as possible.
-
Community Forum: Hostinger’s community forum allows users to ask questions, share knowledge, and engage with other Hostinger customers. You can search for existing threads or start a new discussion to get help from the community.
-
Social Media: Hostinger may also provide support through social media channels such as Twitter and Facebook. You can reach out to Hostinger’s official accounts for assistance or updates.
By utilizing these support resources, you can quickly resolve any issues you encounter and get the assistance you need to build and manage your website effectively on Hostinger.
FAQs
Q: Can I use my domain name with Hostinger?
A: Yes, you can use your domain name with Hostinger. You can either register a new domain name through Hostinger or use an existing domain name that you own.
Q: Can I sell products on my Hostinger website?
A: Yes, Hostinger offers e-commerce tools that allow you to sell products on your website. You can add product listings, manage inventory, and process payments through your Hostinger account.
Q: Is Hostinger’s website builder suitable for beginners?
A: Yes, Hostinger’s website builder is designed to be user-friendly, making it suitable for beginners. The drag-and-drop interface makes it easy to create and customize your website without any coding knowledge.
Q: Can I customize the design of my Hostinger website?
A: Yes, Hostinger’s website builder offers a range of customization options, including changing colors and fonts, adjusting layout, and adding content. You can customize your website to match your brand and style.
Q: Does Hostinger offer SEO tools?
A: Yes, Hostinger offers SEO tools that help you optimize your website for search engines. You can customize meta tags, use relevant keywords, and optimize your content to improve your website’s visibility in search engine results.
